

There are so many projects out there to build, but no DIY equipment collection is complete without a decent DI box. Direct Injection is an important element to any live sound or recording rig. Whether you are recording guitar in your bedroom or in a super-studio, you will more than likely require the use of a Di Box of some description.
The DI Box is an important component for conditioning your guitars signal impedance for your mic preamp. DI Boxes provide a way of isolating the electronics from the guitar and transforms high impedance guitar signals to a much lower impedance which will provide lower noise levels and better frequency response. The DI box I am going to provide info on here is a well known circuit among the DIY audio folk and after building three of them myself, I can highly recommend this project. It is known as "BO's Di", or the 1975 active Di Box by Bo Hansen. Bo decided years ago (Almost 30 years in fact) that the DI Boxes of time were up to shit. So he went about designing and building one of his own, that would maintain low end integrity and eliminate ground loops or noisy outputs from stringed instruments. I can absolutely say that this DI beats the stuffing out of most of the commercially available prosumer boxes. And for anyone wanting to get into building their own gear Bo's DI is a must! I have replaced my old Radials with these babies. I love the way they sound, especially on lead guitar. Loads of attack, plenty of sustain and serious frequency range. Oh, and they are really quiet too!
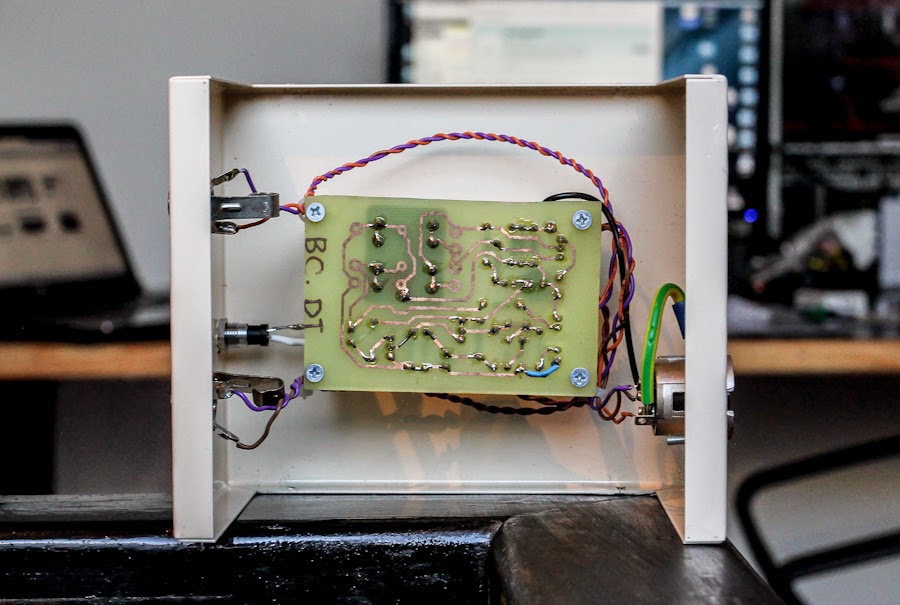 |
| My own disheveled self etched PCB, it doesn't look all that pretty, but it works real good! |
Bo Hansens DI box.
Bo's Di box is a rather simple device. It is based around a 1:6.45 transformer, available options are pretty wide here, the board itself supports the OEP A262A3E or the Haufe ST 8456. But Im pretty sure you can use just about any suitable transformer for the job. The circuit has an input impedance of 1 Mohm which is suitable for just about any high impedance guitar output. The transformer steps things down to around 2oo Ohm's at the the boxes output. Which makes it very suitable for a range of mic pre's at very low noise levels. There is also a ground loop suppressor instead of a ground lift and a handy protection circuit on the input, just incase you do something stupid. There is not a lot to say about the components, the shopping list is small enough and parts are generally available from most nerd emporiums (Electronics shop)
 |
| The Schematic |
Some introduction links to get you reading before building.
Group DIY thread. (All info is here, including support)Group DIY Bo Hansen Link
Bo's Own page on his DI box
Here is a list of what you need and where you can find it.
PCB.
Although this project is very doable by etching your own circuit boards, manufactured boards are available from Gustav at PCB Grinder. He will also sell you a transformer if your ok spending a bit of extra cash on a Lundahl. I have used a the OEP transformers which are a lot cheaper with great success.
PCB Grinder Bo DI link
Bo DI pcb at PCB Grinders site
Self etch files are available here.
Self Etch files for Bo's DI box.
If your feeling sassy, and you want to melt your kitchen sink with Ferric Chloride, then you can always etch your own boards. I did this on my first one, and it worked great! And I managed to keep the kitchen sink in one piece too!
Self etch files are available here.
Self Etch files for Bo's DI box.
General parts list
Parts are easy to find, I had no issue grabbing what I need for my "prototype" at my local lekky shop. Ok, better quality parts should be considered, but the box will work pretty good with standard Chinese garbage that you can pick up for a few cents a part. Although if you are serious about quality, I would recommend getting some brand names involved. The second one I built utilised WIMA and Panasonic Caps as well as Vishay 1% resistors and Neutrik connectors. The transformer might be the only thing that takes a little bit of looking for.
The parts list can be found here.
Bo's DI parts list
Transformer
OEP A262A3E (This is the one I used and it sounds great)
Believe it or not you can buy these from Amazon - Click here
European link
Farnell
 |
| OEP A262A3E |
I would say most of these parts can be had from the usual suspects. Mouser, RS, Alpha, Eagle, ect...
Building
There is nothing complicated about Bo's DI box but you should follow a few of his tips. You can find these on Bo's own page about his DI box.
(This info below is directly ripped from Bo's site. Please rather go there and read it all. But for quick reference look below)metal box/case groundThe metal case/housing for the DI-box electronics, shall only be grounded on the XLR output connector pin 1, and also connected to a solder tag fixed in one of the XLR fasten screws.(this is the only ground connection to the metal case)Source Bo Hansen
Then a additional cable from XLR pin 1 to the electronic ground system rail (the bottom line in the schematic) in series with the 0,1 uF, 100 ohm and the two diodes.
isolated plastic jacksThe two tele jacks must be isolated from the metal box, use plastic jacks, with plastic nut or crome nut with isolated washer, the jacks ground/sleve shall only be connected in the electronic ground system rail.
This is very important, to get the ground loop suppressor to function properly.(this is the only ground connection to the metal case)Then a additional cable from XLR pin 1 to the electronic ground system rail (the bottom line in the schematic) in series with the 0,1 uF, 100 ohm and the two diodes.
isolated plastic jacksThe two tele jacks must be isolated from the metal box, use plastic jacks, with plastic nut or crome nut with isolated washer, the jacks ground/sleve shall only be connected in the electronic ground system rail.This is very important, to get the ground loop suppressor to function properly.shortet input jackThe input jack should be shorted to ground when it is un-plugged.There is an extra connection/solder tag for the rear tip contacts that is the brake switch, this connection/solder tag shall be connected to the ground on the input jack.(the link can be seen in the picture of the input jack mounted in the lid)This removes noise, hum and interference with un-plugged input jack.transformer case groundThe metal casing of the transformer shall only be connected to the electronic ground system, and not in contact with metal box.it is not unususal that there is an extra cable or connector pin for the transformer core, this must also be connected to the electronic ground system.LED type and connection (pc-card version)Use a 3 or 5 m.m. red LED, because the low voltage drop. (other colours have higher voltage drop)If the LED is mounted visible from the outside from the box, it must of course be connected with loose cables from pc-card.The long leg shall be connected next to the two 6,8K resistors.If the LED is not used, use a link instead of LED.
some small electronic corrections
not corrected in the schematic
improved the bias stability
Change the two 470 kohm to 100 kohm
Change the 1 uF to 10 uF/35 voltnot corrected in the schematic
improved the bias stability
Change the two 470 kohm to 100 kohm
Change the 1 uF to 10 uF/35 voltChange the two 470 kohm to 100 kohmChange the 1 uF to 10 uF/35 voltto reduce the component supplyChange 47 ohm to 100 ohmChange 0,047 uF to 0,1 uF

Enclosure's
Its a good idea to use aluminium enclosures. This way you can ground the chassis to shield the circuit from noise and interference. The Hammond 1590S seems to work well. The 1590B's are a little shallow if I'm not mistaking. I used a rather oversized hammond enclosure for my prototype and it looks really cool. The silver handle on the top came from my local hardware shop and is actually used for a cupboard door. The finish I did in my usual way with water slide decals and plasticote spray.
To round up
These DI boxes are simply amazing. They cost around $50 to make and sound fantastic. I highly recommend building one of these babies for your rig. I started my "prototype" on a sunday morning and finished it by lunch time. SO its a quick, easy and fun project to sink some noob teeth into. So heat up your soldering irons and get cracking, Bo's Di is a winner.
Gunna see if there is some time to do some test recordings and post them here at some point (Jeez, I shouldn't promise that!)
Gunna see if there is some time to do some test recordings and post them here at some point (Jeez, I shouldn't promise that!)
This comment has been removed by the author.
ReplyDeleteHi,
DeleteCan you give me the reference of your hammond enclosure ?
Thanks
Hi there.
ReplyDeleteI don't really know what you mean by the "reference" but....
I think its a 1454 series enclosure. There are a few on the hammond website that look more heavy duty. But I'm sure they cost a small fortune. The 1454 wasn't very expensive. Around $12 I think. The handle came from the local hardware store. Just a cupboard door handle. No paint either. Thats the colour it came in.
Try this link for more info. Thanks for reading.
http://www.hammondmfg.com/dwg14.htm
There would be a way of making this DI work with 9v from an aca adapter os a Battery??
ReplyDeleteNo way that I know of.
DeleteCan you give us some sound samples?
ReplyDeleteThis comment has been removed by a blog administrator.
ReplyDeleteHI, what configuratión is correct for a OEP A262A3E? (Paralell/paralell,series/series...??)
ReplyDeleteHere's the OEP for 10.- euro + shipping:
ReplyDeletehttps://www.aaaa-electronic.de/products.php?Hochleistungsaudiouebertrager-A262A3E-150-ohm-6-25-kohm-Durchsteckmontage-1Stueck
Nice post! This is a very nice blog that I will definitively come back to more times this year! Thanks for informative post. 桃園音響店
ReplyDeleteI have read a few of the articles on your website now, and I really like your style of blogging. I added it to my favorites blog site list and will be checking back soon. Please check out my site as well and let me know what you think. 桃園音響店
ReplyDeleteJust admiring your work and wondering how you managed this blog so well. It’s so remarkable that I can't afford to not go through this valuable information whenever I surf the internet! 新竹 音響店
ReplyDelete