

Ok, so the case is complete, I'm not going to bore you with the step by step details on enclosure finishing. There are a plethora of internet guides on this subject. I like to use the water slide decal method. All I do is get a Hammond 1590B enclosure, spray it with a lacquer primer, light sanding, 3 coats of lacquer mat spray paint, light sanding, 3 more coats, another light sanding and wash. Then I design and
print out the label using my trusty laser printer. Water slide that sucker on to there and finish with 3 coats of clear plasticoat sealant, light sanding then 3 more coats wait till completely dry, light wet sanding (1000 - 1200 grit) and a good old fashion polish. Turtle wax and a buffing drill attachment works good to get a nice hi gloss finish.
Part One of this build can be found here

As you can see here we have the enclosure with the hardware attached. I often like to label the tops of the pots so I dont get confused during the wiring stage. As far as drilling the enclosure is concerned. I like to place the main decal first and finish the case before drilling. Some might be yelling at me here, but I find that including drilling locations with the decal makes for more accurate placement in relation to the decal. It's also important to note that I use a standard drill press for all the enclosure drilling. I also use a soft cloth beneath the enclosure when drilling as I dont want to scratch the finish in the process. I did also drill a hole just below the fuzz control for the LED. You'll see it in the last photo.

The next thing I did is place a couple of little plastic standoff's (the type with the adhesive backing) to the pots to allow the PCB to comfortably attach to the inside.

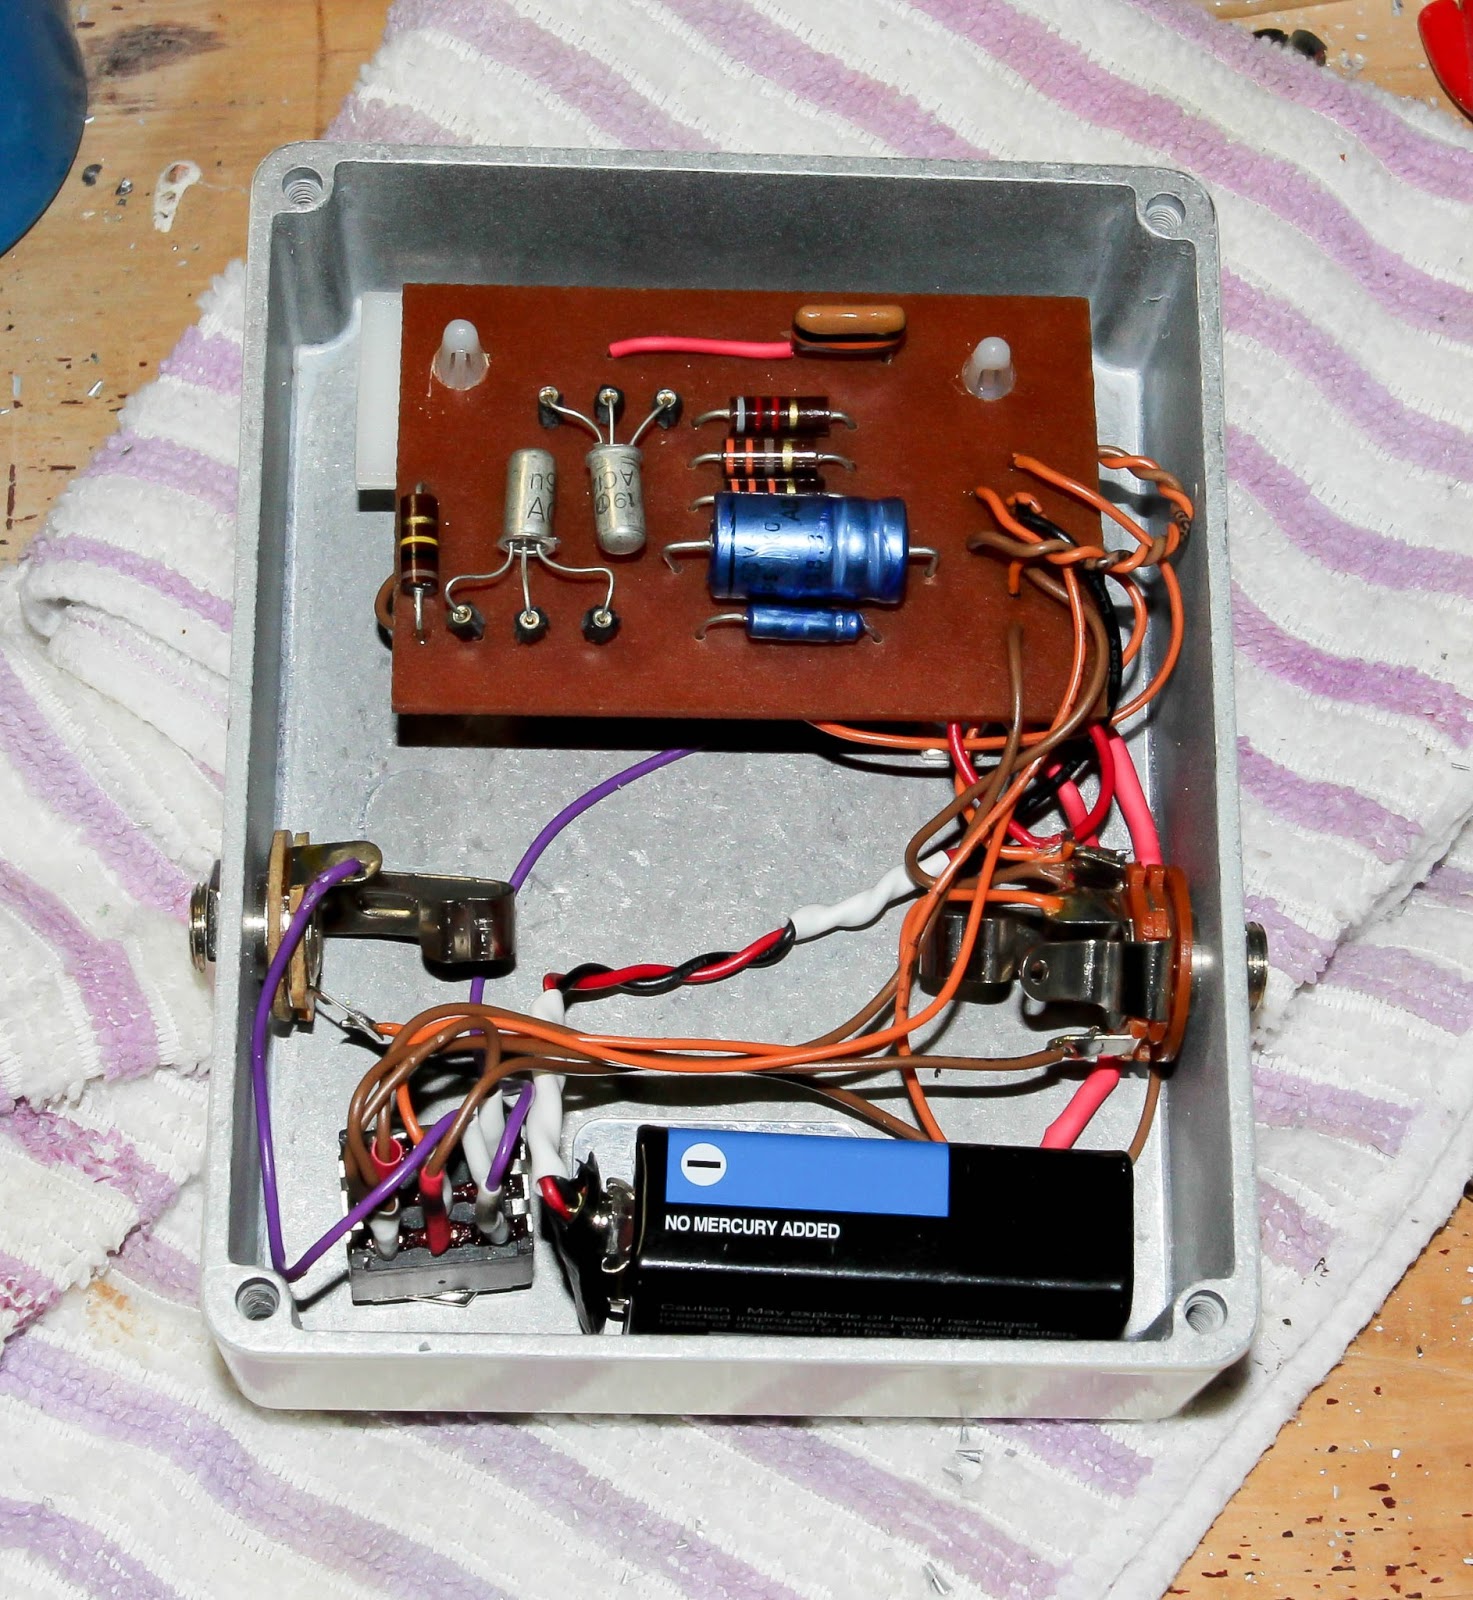
Luckily things only just fitted. I have often had problems with securing the PCB to the enclosure, I have in the past used a hot glue gun and simply glued the pcb to the pot. But this, for obvious reasons is not ideal. These plastic standoffs provide excellent insulation while securing the PCB and allowing for easy removal if any kind of repair is needed in the future.

There are my little beauties. The transistors I will be using for this build are new old stock AC128 germanium transistors. I managed to grab a few off old favorite part source eBay. While there are a lot of crooks on eBay, by only buying from top rated sellers, I have always received exactly what I have ordered. And these AC128's are no exception. Accourding to the seller, these trannies have been sitting in a store room since 1964 and have been tested and matched specifically for the application of a Dallas arbiter fuzz face. Sounds exciting right? Well yes! they sound fantastic! And after a little read of Steve at Small Bears article on germanium transistors, I concluded that Q1 would utilize the 80 hfe and Q2 would use the 125 hfe for ultimate vintage tone. The others I will be using for a Zvex Fuzz Factory I plan to build later.

Before fitting the transistors, the wiring begins. Take great care when wiring as most of the mistakes one can make while building guitar pedals happens during this phase. I have often spent a good 2 or 3 hours carefully wiring up a pedal only to find that it doesn't work because I wired the tone and volume control's he wrong way round, or I forgot to add the jumper to the 3PDT switch. After building a range of professional line level processors, I can honestly say that guitar pedal wiring can be just as or even more confusing. There are so many ways to mess this up, so take your time.
Wiring for the fuzz face is a little different to some of the other pedals you might have made. This project uses a PNP transistor, which means that the circuit uses a positive ground. This changes things a little, so take care to ensure that you are using the correct wiring diagram. AC128's are PNP where other transistors are NPN and use a negative ground. You can make either, there are some subtle differences in the way the components are installed if using a NPN trannie. Just make sure that you are using the right one. I used this one from general guitar gadgets. I haven't posted the image as the guys there are a bit funny about sharing images from their website (And rightfully so!). So here is a link.
After wiring is complete, you can pop those trannies into their sockets and plug that sucker in. I was amazed as to how creamy the fuzz tone was through my little VOX amp. Really nice pedal to build and own. Was the kit from Pigeon efx worth it? Yes! Every penny. Its a rather nice blast from the past in the form of a new old stock Dallas Arbiter Fuzz Face pedal built by yours truly.
Part One of this build can be found here

Thanks for posting and being so detailed. How do you know which is the "C,B, and E" of the transistors?
ReplyDeleteHi there.
ReplyDeleteI used AC128 Germanium's.
If you hold the transistor with the legs pointing towards you and the centre leg at the bottom (Like an upside down pyramid) the Emitter is on the Right, Base in the Centre and Collector on the left. The Emitter is also closest to the tab on the outside of the casing.
Or you could just have a look at this image
http://www.grindheim.net/electronics/occc/AC128.jpg
Awesome Thanks! Also, did you ground the wire that's shown going to ground?
ReplyDeleteAlso which is the Q1 and Q2 positions?
ReplyDeleteYes. I did ground the the board where it shows ground. I actually used a wiring example from General Guitar Gadgets instead of the recommended standard wiring.
ReplyDeleteYou can select an option that suits you. There are a few options on this page for PNP 3PDT bypass switches, this will include info about the best grounding method.
http://www.generalguitargadgets.com/tech-pages/51-switching-and-wiring/33-many-bypass-switching-options
You can refer to the schematic for the Transistor order. Q1 is between the 2.2uf cap and Q2.
http://2.bp.blogspot.com/-u_JVjfXpS9A/UaUQLXKxiAI/AAAAAAAAAy4/wQWcxIcQjzk/s1600/fuzzface+sche.gif
Thanks for your help. I got the pedal hooked up last night and working! Sounds pretty good. I'm using some classic gain Ge NTK 275 trannies. Volume seems a bit low, as I have to crank to about 3/4 or more until it gets close to my clean tone, and even cranked all the way, it's not extremely loud. The fuzz is very warm and not harsh at all which is great. A weird thing happens when rolling back my guitar volume, seems to drop rapidly from 10-9 and then almost disappears after 8-7. Definitely not the case with my guitar when playing clean. I'm playing through a strat into a fender champ and also tested through a fender bassman.
ReplyDeleteVolume seems louder when the single coils are in the "in between" settings. Which again is normally not the case. Any ideas of why that might be?
Once again, thanks for your help and doing your write up on the build, it was definitely helpful.
Hey no problem. Glad it helped.
ReplyDeletemhd
ReplyDeleteI think this might have something to do with the value of the 470 ohm resistor on the Fuzz face. Try playing with some different values in there. Also I have found that replacing the 8k2 resistor with a 10K trim allows for better biasing. Im no expert but I have the feeling the the resistor in the R3 position control's output. Look at the Fuzz Face Hendrix schematic.
very useful thanks
ReplyDeleteYour Welcome.
DeleteWhere did you get those cool sockets you have the transistor leads plugged into? Or, what is the part description? My searches have only turned up sockets with the three leads together.
ReplyDeleteLate reply, I know. But those are just strip sockets that have been clipped with a side cutter.
DeleteLike this.
https://media.rs-online.com/t_large/F2677438-01.jpg
I must admit I bought several of these kits a few years ago and none of them worked. This could be because I never got round to putting them together and they're still sitting in a biscuit tin in my living room! Seriously though, your page has inspired me to get them out and plug the iron in! Thanks!
ReplyDelete